Top Gifts to Get your Nerdy Friends

Top Gifts to Get your Nerdy Friends

Top gifts to get your tech nerdy friends


Do you have those nerdy friends, and you don’t know what to get them? Well, you’re in luck! From a handheld console to a starlight projector. Here are the top gifts to get your tech nerdy friends.


Nintendo Switch Lite

The Nintendo Switch Lite is an excellent gift for the avid gamer. At 200 dollars, this mini package packs a punch into the handheld systems of today. Like its predecessor the Nintendo Switch, it can play the latest games that are coming out by Nintendo with no hassle at all. The Nintendo Switch Lite has numerous colors to fit anyone. However, the Nintendo Switch Lite is purely a handheld console. It doesn’t have the docking ability like the original Nintendo switch. It also doesn’t have removable, joy-cons. Again, because it’s a handheld system.


Hyper x cloud orbit headset

The hyper x’s gaming headset is a go-to for friends that love gaming. It’s a wired headset that combines excellent audio quality and comfort all in one package. It Uses the advanced audeze mobis, providing crystal clear audio. All in one affordable headset. The mic is stellar and amazes everyone all the time. Tested numerous times, whether to just have a good time and chill with your friends or to be on an important call. The hyper x headset can handle it. This gift is perfect for your game-loving friend.


DJI Mavic Pro Platinum

DJI’s beautifully built Mavic pro is the luxurious drone. The Cadillac of drones one could say. This drone features sensors all over, so you’re very unlikely to crash this drone. It also features a 3 axis gimbal with a 4k camera, so you can take stunning smooth pictures. This premium drone comes with a premium price. At about 1,061 dollars, it’s a pretty heavy amount. But as soon as you start using it you’ll get hooked and want to fly it every day! 


Starlight projector

Perfect for the galaxy loving friend! This is a projector that shows the beautiful star-filled night sky on your ceiling. Alexa and google enabled, making it super easy to use. Coming home from a stressful day at work, it’s nice to just ease up those tensions built from the day. Just stare up at 16.8 million colors being projected up in your room. All this for 80 dollars. Pretty cool! 


These gifts are amazing, ranging from a handheld console to a projector that lets you see into the night sky. Either way, your friends are going to love these gifts.

How to build a custom PC

How to build a custom PC

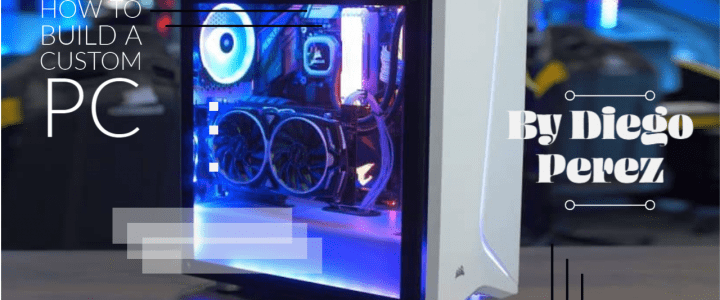
Are you wondering how to build a Custom PC? Well, you are in luck, today I am going to show you how to build a custom pc. First, you have to understand what PC you will need.
Uses for a PC
There are multiple reasons that you would want a PC, Video editing, Accounting, gaming. For example, a Video editor would prioritize CPU power to handle those heavy loads of Video rendering. An accountant or just a person with a job that requires amounts of Multitasking would prioritize RAM. And a gamer would prioritize GPU to handle the graphical intenseness of games.
Putting the Motherboard together
Now that you know what PC you are using this for, we are going to start the process of building the PC. The first step to assembling the motherboard is to set the motherboard on a non-static surface so the components do not get damaged. I recommend the box of the motherboard, as it offers a free test bench and a static-free surface. Once you have the motherboard on the box, you need to unpackage your CPU. Installing a CPU is very critical as if you bend one pin on the CPU, the PC will not boot up, and you break the CPU. First, you undo the latch and take off the plastic piece covering the socket. Now you’re ready to align the CPU to its socket.
It is important to know that you touch the CPU by the corners, and never touch the front or back of the CPU. To align an Intel CPU you need to align the Processor pin one, with the socket pin one. To Align an AMD Ryzen Processor, you need to align the Triangle on the processor with the triangle on the motherboard socket. Now keep in mind, that you cannot install an Intel Processor in an AMD motherboard and vice versa. Now that you’re CPU is aligned you gently lower the CPU in the socket, with no force at all. Then you lower the latch locking the CPU in place. Now it is time to install the CPU cooler.
Depending on what type of cooler you have, whether it’s an AIO cooler or the stock cooler that comes with the CPU. For this demonstration, I will be showing you how to install the stock cooler. To install the cooler, you need to remove the bracket on the motherboard. and put the cooler on the CPU Thermal paste is pre-applied so you do not need to worry. Tighten the screws in a diagonal formation to prevent chipping the motherboard. And now you’re CPU is installed. Next to install is the RAM.
All you have to do to Install the RAM is to line up the notch in the stick of RAM to the break in the slot. Set the stick into the slot and then apply pressure onto the stick until the clamps on the side click and lock the RAM in. You may have to apply a fair amount of pressure, but never force it in. Make sure that if you have 2 sticks of ram, you need to install them in the dual-channel formation.
How to put Motherboard and Case Together

The first step to put the motherboard in the case is to install an IO shield. To install the IO shield you’re going to push with a fair amount of pressure until all corners of the shield pop in the back of the case. Once you have done that, you’re going to get the motherboard and align it with the standoffs and place it down on the standoffs. Make sure that the IO shield and the motherboard are perfectly aligned. Next is to just screw in your motherboard into the standoffs you aligned before. Once you’ve done that you have successfully put the motherboard in the case. Now the PSU
Now take off the back panel and you will see where the PSU has to be. Before you place the PSU you have to take off the bracket that goes on the back of the PSU. Then you insert the PSU in the back of the case. Now that the PSU is in the case, you plug the cables into the motherboard.
First, you plug in the 24 pin CPU to the motherboard, then you plug in the 8 pin connector to the motherboard. Now is the time you install the hard drive into the case. Find the hard drive cage in the case and place your hard drive there. Then take your SATA cable and connect it to the hard drive from the PSU. Then the SATA cable from the hard drive to the motherboard. Congrats! You’ve installed the hard drive. Next is to plug in the case cables to the motherboard,
Take your case cables and locate the cables that power your system, based on your motherboard’s manual plug in the power cables into the right pins. Next, USB headers, based on what generation the USB is, find your motherboards GEN 1, GEN 2, or GEN 3 and plug it in there. You’re almost done, now to install the GPU
To install the GPU is simple, undo the brackets on the case by the PCIe slots. Like RAM, to install the GPU you align the slot with the notch and gently push the GPU in the x16 PCIe slot. Make sure you install the Graphics card on the highest x16 PCIe slot, this will allow the best performance on the GPU.
Congratulations you have just built your first custom PC!

Microsoft’s Cloud-Based Gaming Service

Microsoft’s Cloud-Based Gaming Service

                     Microsoft’s Cloud-Based Gaming Service

Microsoft’s new gaming service called xcloud brings gaming to a whole new level. Bringing

competition to Google’s cloud gaming service, stadia. Xcloud was released on android on September 15th but has yet to come to apple because of its strict app store policy. Here’s everything you need to know.

Everything you need to know!

Microsoft’s new cloud-based gaming service, xcloud. A streaming service that allows usually high demanding games on a phone. Microsoft has done this by using huge data centers and putting Xbox like components in them. Then, the data servers stream directly to your mobile device. Xcloud at no extra cost is bundled with the Xbox Game Pass Ultimate. If you don’t have this bundle, you’ve missed out on this. However, not all hope is lost for those of you that don’t have game pass ultimate. With the new next-gen Xbox, you can choose a financing option for 35 dollars a month you’re paying for the console and the game pass. Very good deal, if you ask me! Now more about the streaming service. 

Since xcloud is relatively new, you can play 150 games, but later this year the game pass is partnering with EA play, meaning that this library goes up by about 50 games. Giving the total to be, a big 200 games. To keep it simple, xcloud is a streaming service for games that’s able to play usually high performance required games on a weak device such as a tablet or phone. But as per usual Apple is giving Microsoft problems.

Microsoft’s problem with Apple

Microsoft was beta testing with apple devices and was ready to send it to the app store for it to get verified and put up. Apple declined it because it violates the rules, sounds kinda fishy to me. 

Speculations have shown that they don’t want it to be on the app store, because it would make Apple’s “Apple Arcade” obsolete. It would make sense because xcloud is better in every way. Think about it, console games on a weak device, I’m sold! Now it’s not over yet! Microsoft is working on a browser-based solution for apple devices. They’re doing this by creating a catalog style app that collects and links to each game. Similar to Amazon’s luma cloud-based gaming service. In theory, this will work, but you never know with Apple. It’s expected to be on Apple’s devices in late 2020, to early 2021. Overall this streaming service sounds amazing, and I’m very excited to try it myself!

Valve Index: In Depth Review

Valve Index: In Depth Review

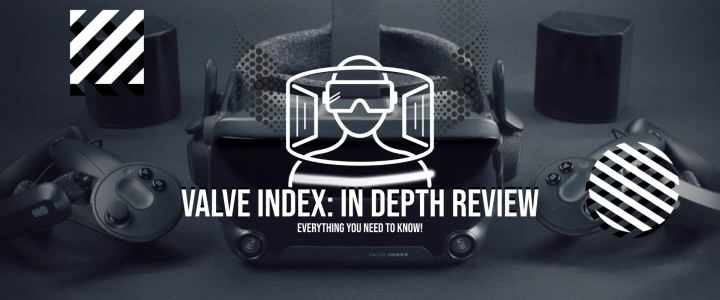
Valve, the makers of steam and the pioneers of VR. They’ve made countless VR headset prototypes. And made a software platform for VR headsets. They partnered with htc to make one of the most influential VR headsets. The HTC Vive, but now they have made their headset, The Valve Index. The Valve Index is a high-end VR headset, with a high-end price.

Unboxing/Price

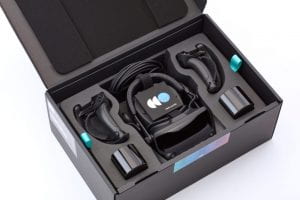
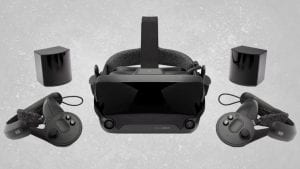
There are 3 different packages of the Valve Index. One, just the headset. Two, the headset and the controllers, and three, the headset, controllers, and 2.0  base stations. 

Each of these comes at different prices. Only the headset costs 499. The headset and controllers cost 799. And the headset, controllers, and bases stations cost a whopping $999. If you don’t know, you need base stations to track the headset and controllers. The reason you have an option without base stations is that they also can be tracked with 1.0 base stations. However, if you’re new to VR you have to buy the USD 999 package. Although, the price comes to a beautiful headset and revolutionary controllers.

Design

The Valve Index is one of the most aesthetically pleasing headsets. It has a pure black finish with dials all over the headset. And with plush material for the mask, you can wear this headset for hours on end. It’s that comfortable. The dial controls numerous things. It controls how far the display is from your eyes, it also controls how tight/loose the headset is. This headset also has 2 cameras in front to further help to track. The Verge has stated that this gives a sad robot with a big forehead type of look. Which is very true. However, don’t let that comment fool you. This feels and looks like a 1000 dollar headset, as it should.

This headset is beautiful. But this is a tethered headset. You have three cables connecting to your VR ready PC. The controllers are one of the most compelling reasons to buy this headset. The controllers are just stunning, they match the aesthetic of the headset. It has an all-black finish. And the specs? They’re even better.

High-end Price, High-end Design, High-end Specs.

The Valve Index features a 1440 x 1600 per eye. This alone just destroys the Vive and The oculus rift. Images on this are crystal clear with an amazing display. This headset barely has a screen door effect. One of the most annoying things in VR. This also has a smooth 144 Hz display, to help reduce screen door effect and motion sickness. However, you need a beast of a gaming PC to run this headset. The controllers use a grip that individually tracks fingers and pressure. Meaning you can play games on another level.

Overall the headset is amazing, but it does come with a cost, the price. Read more

Skip to toolbar